Choosing the best Wireless Remote Bike Turn Signal in 2026 is about more than brightness or a sleek look. A useful signal should be easy to operate without taking your hands far from the handlebars. It should also remain visible in daylight, mount securely, and withstand ordinary rain and road vibration. Small details matter. A slippery remote or a dim rear indicator can undermine an otherwise promising design.
This guide compares the features riders can check before buying, including wireless range, battery life, charging method, mounting options, and controls that work with gloves. Product specifications are useful, but they do not tell the whole story. A signal may look bright in a product photo and seem less clear from across a busy intersection. Fit can vary, too, depending on a bike’s frame, seat post, or rack. Check compatibility carefully. No accessory replaces looking around, signaling clearly, and riding attentively. That reminder is easy to overlook. The right choice depends on your routes, budget, and comfort with installation. We’ll weigh practical trade-offs rather than treat any single model as perfect. Some claims may sound convincing, but real-world visibility and reliable controls deserve closer attention.
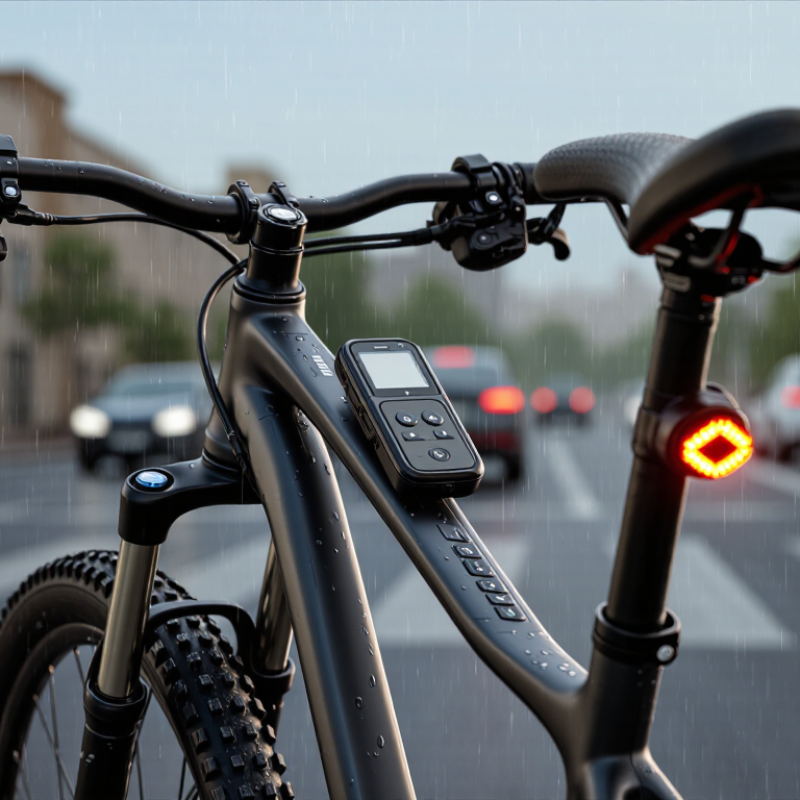
A wireless remote bike turn signal is a small lighting system with two parts: rear indicators and a handlebar control. The control sends a radio signal to the lights, so no cable needs to run from the handlebar to the rear of the bike. A rider presses a left or right button, and the matching light flashes to show the intended direction. Some systems also include a brake light or hazard mode, but features vary.
In everyday use, the remote should sit where a thumb can reach it without shifting grip. The rear unit needs a clear view, often on a seatpost, rack, or bag. Check that it stays secure over bumps. Battery life, charging access, and signal response matter more than a long feature list. Test the indicators before riding, and make sure sunlight or a rain-covered lens does not hide them. Small details count.
Wireless does not mean effortless. A remote can lose power, move out of position, or be pressed by mistake. It may also take practice to signal without looking down. I would not treat flashing lights as a replacement for clear hand signals or attentive riding. They add visibility, but they cannot guarantee that another road user has noticed. A quick check before each ride is useful, though easy to forget.
A wireless bike turn signal uses a handlebar control to send a short radio command to lights mounted behind the rider. Pressing the left or right button tells the rear unit which direction to flash. Many systems use a small transmitter, a receiver, and rechargeable batteries. The parts need to be paired before a ride.
That matters. A flashing light that never received the command is no help in traffic.
The receiver usually attaches to a seat post, rack, or backpack, where drivers can see it clearly. The remote should sit within easy thumb reach, without making the handlebars crowded. Radio signals travel quickly, but walls are not the issue outdoors; distance, a loose mount, or a depleted battery can still cause trouble.
Not magic. Check the charge, test both buttons, and confirm the lights respond before setting off.
A bright display can be hard to notice in strong daylight, and a signal does not explain a rider’s full movement. I would not assume every driver understands an unfamiliar light pattern. Keep turning your head and riding predictably, too.
There is a small trade-off: wireless control makes installation neater, but it adds another battery and connection to check.
Key Features to Compare in 2026
Choosing a wireless remote bike turn signal means comparing more than brightness. Check whether the rear unit shows clear left and right arrows from different angles, including when a car sits slightly behind you. Compare remote reach and response time, too. A signal that reacts late can confuse nearby road users. NHTSA reported 1,105 bicyclist deaths in traffic crashes in 2022, a 13 percent increase from 2021. That report tracks fatalities, not turn-signal effectiveness, but it underlines why clear communication matters. Look for a secure handlebar remote, a stable seatpost mount, and weather resistance. Small details count.
Battery life should be stated for real use, not just standby. Check charging time, low-battery warnings, and whether the device remains usable in rain. A wide viewing angle helps at dusk, while a bright daytime setting matters on sunny roads. Test the controls with gloves before relying on them. No signal replaces a clear hand signal or attentive riding; that distinction is easy to overlook.
Tips: Mount the rear unit where bags or clothing will not block it. Test both arrows before each ride. If the remote needs a hard press, or the signal is hard to see from the side, reconsider the setup. A little awkwardness is worth noticing before traffic gets busy.
Sources: NHTSA, Traffic Safety Facts: Bicyclists and Other Cyclists, 2022 data.
| Feature | What to Compare | Why It Matters | Practical Buying Check | Priority |
|---|---|---|---|---|
| Signal visibility | LED brightness, illuminated area, viewing angle, and visibility in daylight and at night | A signal needs to be noticeable to drivers and other road users from behind and, where possible, from the sides. | Check whether the manufacturer provides brightness or viewing-angle specifications. Look for a clear, high-contrast signal that remains visible in daylight. | High |
| Wireless remote operation | Handlebar mounting, button size, button placement, and wireless connection reliability | The rider should be able to activate a signal without moving a hand far from the handlebar or losing a secure grip. | Confirm the remote fits the handlebar and can be operated while wearing the gloves you use for cycling. Check the stated wireless range and test connection reliability in normal riding conditions. | High |
| Signal cancellation | Automatic cancellation, manual cancellation, and timeout behavior | A signal left on after a turn can confuse other road users. | Check whether the system cancels automatically, requires a second button press, or turns off after a stated interval. Do not assume automatic cancellation unless it is specified. | High |
| Brake light function | Whether braking is detected automatically and whether the brake indication is distinct from the turn signal | A brake indication can provide an additional warning when slowing down, but its operation should be clear and dependable. | Look for a description of how braking is detected, such as an accelerometer, and check whether the brake light can be distinguished from the turn signals. | Useful |
| Mounting and compatibility | Seatpost, rack, saddle, helmet, or other mounting options; fit range; included brackets | A secure, correctly positioned light is less likely to shift, become obstructed, or detach during a ride. | Measure the mounting location and compare it with the stated fit range. Check whether the light remains visible with your saddlebag, rack, or other accessories installed. | High |
| Battery and charging | Rechargeable or replaceable battery, charging connector, charging time, and runtime by mode | Actual runtime can vary with brightness, signal use, temperature, and battery age. | Compare runtime figures for the modes you expect to use, rather than relying on a single maximum-runtime figure. Check the battery indicator and charging method. | High |
| Weather protection | Published IP rating and instructions for charging, cleaning, and storage | Rain and road spray can affect electronics, especially around charging ports and seals. | Check the exact rating and its stated conditions. For example, IPX4 indicates protection against water splashes; it does not mean the device is suitable for immersion. | High |
| Wireless interference and pairing | Pairing process, reconnect behavior, and operation around other wireless devices | A remote that disconnects or pairs inconsistently can make signals unreliable when they are needed. | Look for clear pairing and reset instructions. Check whether the light reconnects automatically after being switched off or recharged. | Useful |
| Controls and feedback | Left/right button distinction, tactile feedback, audible alerts, and visible status indicators | Easy-to-identify controls can reduce distraction and help prevent selecting the wrong signal. | Check whether the remote is usable by touch and whether the rider receives confirmation that a signal has been activated. | Useful |
| Maintenance and durability | Replaceable mounts, availability of spare parts, cleaning instructions, and warranty terms | Mounts and batteries may need attention over time, particularly with frequent outdoor use. | Review the warranty conditions and check whether commonly worn mounting parts can be replaced separately. | Useful |
| Road-use rules | Local requirements for bicycle lights, colors, flashing patterns, and turn signals | Lighting rules differ by location, and an accessory signal may not replace required lights or hand signals. | Check the rules where you ride. Keep legally required front and rear lights, reflectors, and signaling practices in mind. | High |
How to choose: Prioritize clear visibility, dependable remote control, secure mounting, and weather protection. Compare manufacturer specifications for each model; battery life, wireless range, and water resistance can vary substantially between products.
Choose a wireless bike turn signal for the rides you actually take. A unit that works well on a dry commute may be awkward on rough roads or in rain. Check whether the rear lights are clearly visible from the sides, not just straight behind. Bright daylight can wash out small indicators. Small details matter.
The remote should mount within easy thumb reach without blocking your brake lever or shifting controls. Try pressing it while wearing your usual gloves. Buttons that feel obvious indoors can become fiddly on a cold ride. Test the wireless connection at the distance you expect to ride from the rear unit, and look for a clear low-battery warning. Battery life claims vary with use, so consider how often you are willing to recharge it.
Fit and mounting deserve a close look. A light that slips on a bumpy road is not much help. Check that the mount suits your seatpost or rack, and that the unit can be removed for charging without tools. One detail is easy to overlook: can you tell left from right without staring at the remote? Treat the signal as an extra cue, not a replacement for checking traffic and communicating clearly.
A useful wireless bike turn signal should be easy to see, simple to operate, and secure on your bicycle. Before installation, check that the rear unit fits the seatpost or rack without blocking a reflector or light. Tighten the mount, then gently try to rotate it by hand. Aim the indicators straight back, not toward the pavement. Check twice.
Place the handlebar remote where your thumb can reach it without shifting your grip. Test both directions while the bike is stationary. Confirm that each button activates the correct side and that the indicators stop when expected. If the system uses a rechargeable battery, charge it fully and learn how to check its level. A loose mount or a flat battery can make a promising device unreliable.
Practice signaling in a quiet area before relying on it in traffic. Look over your shoulder, signal early, and keep a steady line; the indicator does not show whether a lane or turn is clear. Follow local signaling rules, since an electronic signal may not replace a required hand signal. Check twice. Rain, dirt, and bright daylight can reduce visibility, so inspect the lens and test the unit before rides. One easy mistake is assuming a flashing light is obvious from every angle. It isn’t. Make sure your positioning stays comfortable, too.
It pairs a handlebar control with rear lights. Pressing left or right makes the matching indicator flash. No cable runs between them.
Keep the remote within easy thumb reach without changing your grip. Mount the rear light on a seatpost, rack, or bag, with a clear view behind you.
The control sends a short radio command to a receiver in the rear unit. The parts need to be paired. Not magic.
Check the charge, press both direction buttons, and confirm each light responds. Make sure the unit stays secure when you gently move the bike.
Look for clear arrows from different angles, quick response, a stable mount, and weather resistance. Test the controls with gloves, too.
Yes. Strong sunlight can hide a display, while water or a covered lens may reduce visibility. Check the lights in conditions similar to your ride.
No. They can add visibility, but they cannot ensure another road user sees or understands them. Keep looking around and ride predictably.
They make installation neater, but add a battery and connection to check. The remote can shift or be pressed by mistake. I still might forget to test it.
A Wireless Remote Bike Turn Signal is a lighting system that lets a rider indicate intended turns using a handlebar-mounted control and rear-facing signals. The wireless connection sends a command from the remote to the lights, reducing the need to reach behind or take a hand away from the controls. When comparing options in 2026, consider visibility in daylight and darkness, signal brightness, battery life, charging method, weather resistance, mounting stability, and how clearly the controls can be operated while riding.
The best choice depends on the bike, usual routes, and riding conditions. Check that the lights fit securely and remain visible from behind, then follow the device’s setup instructions and test each signal before setting off. Use turn signals as an extra communication aid, not a replacement for attentive riding, clear hand signals when appropriate, or awareness of surrounding traffic. Proper installation, regular charging, and simple, consistent operation can help make a signal more useful and dependable.